
Goal
The intention of this tutorial is to describe the creation of an Axis2 WebService in Eclipse along with the setup of JMeter for functionally testing that WebService. The user will go through the steps of manually testing the WebService in a single instance, then will use JMeter to automate multiple runs of the test case, and finally will use Hudson to automate the running of the JMeter Test Plan with Ant.
Create an Axis2 WebService
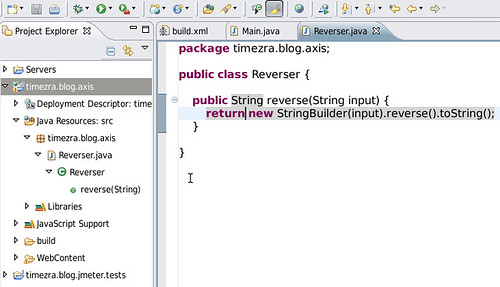
We want to deploy a new WebService in Eclipse using Axis2 and Tomcat. Here we can create an Axis2 project called timezra.blog.axis along with a simple service implementation that returns the reverse of an input String.
package timezra.blog.axis;

public class Reverser {
  public String reverse(String input) {
    return new StringBuilder(input).reverse().toString();
  }
}
Manually Test The WebService
After deploying the WebService, we can use a tool such as SoapUI for Eclipse to create a WebService request.
<soapenv:Envelope xmlns:soapenv="http://schemas.xmlsoap.org/soap/envelope/" xmlns:axis="http://axis.blog.timezra">
  <soapenv:Header/>
  <soapenv:Body>
    <axis:reverse>
      <axis:input>?</axis:input>
    </axis:reverse>
  </soapenv:Body>
</soapenv:Envelope>
A JMeter Project in Eclipse
JMeter is not well-integrated into Eclipse, but we can still run it from the Eclipse environment. First, we will create a New -> Project... -> Java Project called timezra.blog.jmeter.tests. We will need to set Properties -> Java Build Path -> Source -> Default output folder to a directory other than bin. JMeter houses its executables in the bin, but this directory is cleaned by the Eclipse builder when it re-compiles any project source code. Now we can download the JMeter binary distribution and unpack the contents directly into the timezra.blog.jmeter.tests project. For our particular JMeter tests, we will also want to put the Beanshell, Junit 4, and java mail jars into the lib, lib/junit and lib directories, respectively. Beanshell will be used for writing Beanshell Assertions and Post-processors in our test cases. JUnit 4 will provide access to JUnit assertions and Hamcrest Matchers in Beanshell. Java mail is necessary for running WebService Samplers.
I tend to prefer using a custom Main runner to using the JMeter bat and shell scripts from inside Eclipse. A simple runner only contains a few lines of code.
package timezra.blog.jmeter.tests;

import java.io.File;
import java.io.IOException;

public class Main {
  public static void main(final String[] args) throws IOException {
    System.setProperty("user.dir", new File("bin").getCanonicalPath());
    org.apache.jmeter.NewDriver.main(args);
  }
}
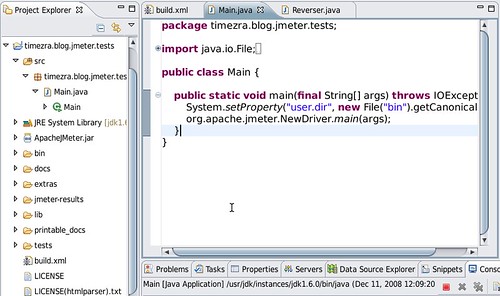
The JMeter Eclipse Project.
Run JMeter From Eclipse
Now that we have a main runner, we can go to src -> Run As -> Java Application. We may need to adjust the heap settings of the launch configuration to something along the lines of -Xms40m -Xmx512m as our Test Plans become more robust.
Suppose we want to run our WebService using input from a CSV file. Let's save our initial Test plan as /timezra.blog.jmeter.tests/tests/ReverseTest.jmx. We will also want to save a data file called /timezra.blog.jmeter.tests/tests/ReverseTestData.csv, and in here we can include a few test messages for the WebService. Below is a snippet from a test file with 500 lines that can easily be generated:
This is input 1 to the WebService.
This is input 2 to the WebService.
This is input 3 to the WebService.
....
This is input 500 to the WebService.
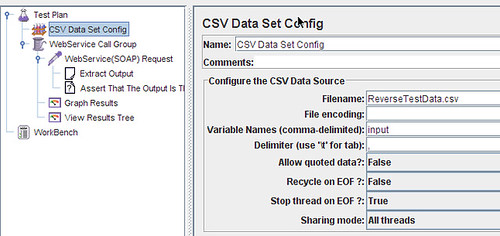
From the JMeter test, we can use each line of input by creating a Test Plan -> Add -> Config Element -> CSV Data Set Config. The file name is relative to the Test Plan. Our variable can be called input. All threads can share the file.
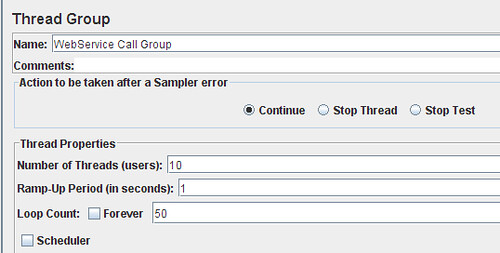
We can now create the Test Plan -> Add -> Thread Group that will run the WebService test. Our number of threads can be set to 10 and the loop count can be set to 50, i.e., there will be 10 concurrent requests in 50 batches.
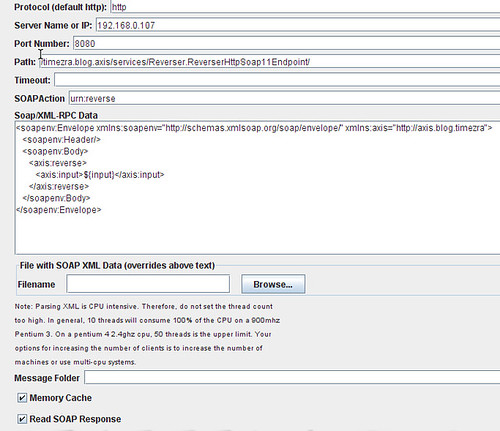
To run the WebService Request we will create a Thread Group -> Add -> Sampler -> WebService(SOAP) Request. Here we can set the WSDL URL (http://localhost:8080/timezra.blog.axis/services/Reverser?wsdl), Load WSDL, Configure and paste the SOAP body from our previous manual test into the SOAP/XML-RPC Data area. To view the SOAP response, we also want to ensure that Read SOAP Response is checked.
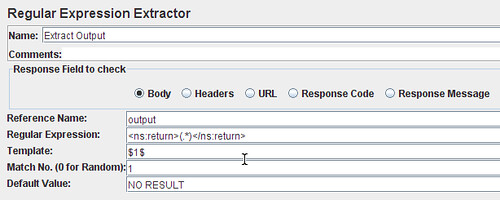
To interpret the response from the WebService request we can include a WebService(SOAP) Request -> Add -> Post Processors -> Regular Expression Extractor and we can assign the contents of the ns:return tag to a variable output.
To verify the output, we can create a WebService(SOAP) Request -> Add -> Assertions -> BeanShell Assertion that compares the reversed WebService input with the WebService output.
String input = vars.get("input");
String output = vars.get("output");
String reversedInput = new StringBuilder(input).reverse().toString();
org.junit.Assert.assertEquals(reversedInput, output);
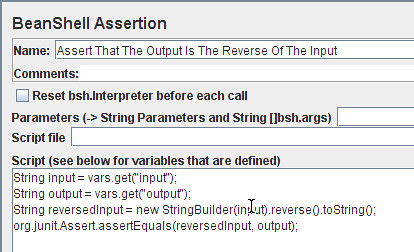
The BeanShell Assertion Configuration.
Finally, we can add listeners for reporting on the test run output. Here, we will create a Thread Group -> Add -> Listeners -> View Results Tree and Thread Group -> Add -> Listeners -> Graph Results.

The Tree depicts request and assertion results and specific WebService responses.
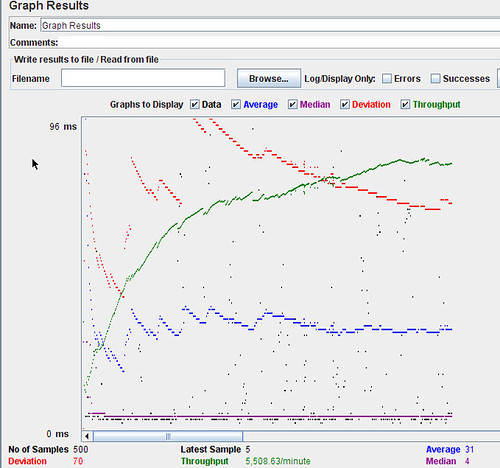
The Graph displays average, median, min and max request times for all thread runs.
Run JMeter From Ant
Now that we have a manual JMeter test, we will automate the process. We can create an Ant file for running the tests from our Continuous Integration server. This build script will also transform the JMeter result JTL file to a human-readable HTML file and place it into an expected build artifacts directory. Fortunately, JMeter provides XSL stylesheets for this transformation in the project extras directory.
<project name="JMeter-Runner" default="run-jmeter-tests">
  <property name="jmeter.home" location="." />
  <property name="jmeter.tests" location="tests" />
  <property name="jmeter.results.dir" location="jmeter-results" />
  <property name="jmeter.results.jtl" location="${jmeter.results.dir}/jmeter-results.jtl" />
  <property name="jmeter.results.html" location="${jmeter.results.dir}/jmeter-results.html" />
  <property name="jmeter.results.xsl" location="extras/jmeter-results-detail-report_21.xsl" />

  <taskdef name="jmeter" classname="org.programmerplanet.ant.taskdefs.jmeter.JMeterTask">
    <classpath>
      <fileset dir="${jmeter.home}/extras">
        <include name="ant-jmeter-*.jar" />
      </fileset>
    </classpath>
  </taskdef>

  <target name="init">
    <mkdir dir="${jmeter.results.dir}" />
  </target>

  <target name="clean">
    <delete failonerror="false">
      <fileset dir="${jmeter.results.dir}">
        <include name="**/*" />
      </fileset>
    </delete>
  </target>

  <target name="reformat-report">
    <xslt in="${jmeter.results.jtl}" out="${jmeter.results.html}" style="${jmeter.results.xsl}" />
  </target>

  <target name="run-jmeter-tests" depends="init, clean">
    <jmeter jmeterhome="${jmeter.home}" resultlog="${jmeter.results.jtl}" failureproperty="failure-property">
      <property name="jmeter.save.saveservice.output_format" value="xml" />
      <property name="jmeter.save.saveservice.response_data.on_error" value="true" />
      <testplans dir="${jmeter.tests}" includes="*.jmx" />
    </jmeter>
    <antcall target="reformat-report" />
    <fail>
      <condition>
        <equals arg1="${failure-property}" arg2="true" />
      </condition>
    </fail>
  </target>
</project>
JMeter In Hudson
Finally, we can setup a Hudson build on Tomcat.
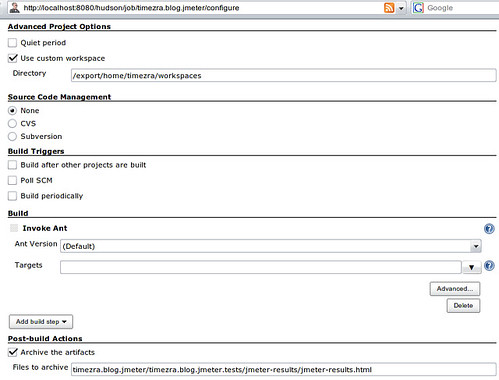
Because we do not have a source control manager, we will point Hudson to a Custom Workspace (under Advanced Project Options), configure the builder to Invoke Ant, and archive the JMeter HTML result report artifact.
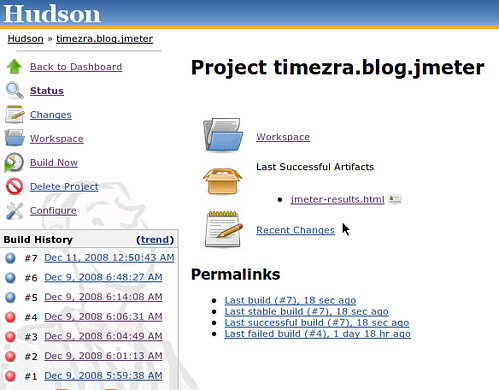
The HTML artifact will now appear on the build results page.
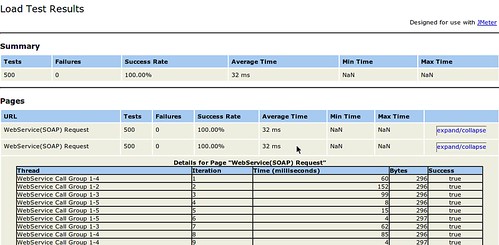
The JMeter Detail Report can be opened in a browser.
1 comment:
Thank you - very informative, and extremely useful!
Post a Comment